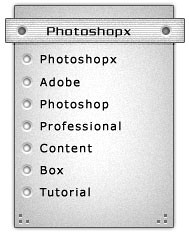
Learn how to make a professional content or menu box using adobe Photoshop.
Let's start.
>>open new document or press "Ctrl+n", we'll use 300x300x.
1) Choose white color and pick the Rectangle Tool(B). Click on your document and
draw a rectangle.
Click on "Rasterize Layer" shown on blow picture.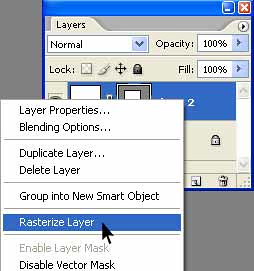
2)Making menu box style
We're going to give it some drop shodow,inner shodow and stroke.
Go to Layer >> Layer style >> Blending options and choose the following
settings: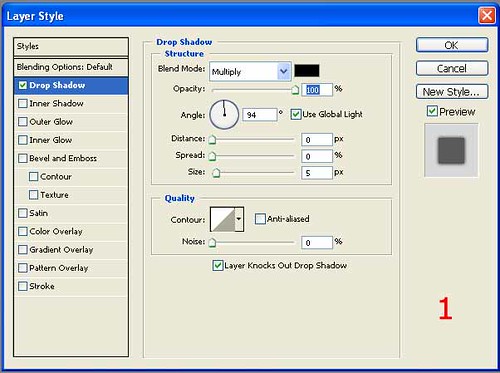
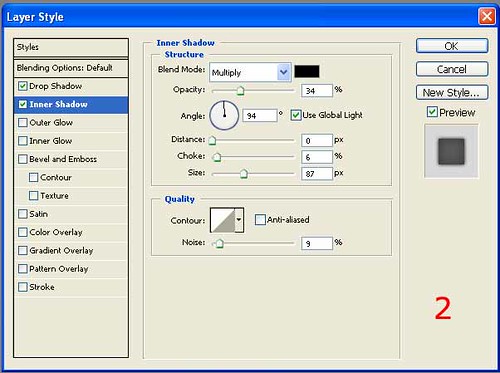
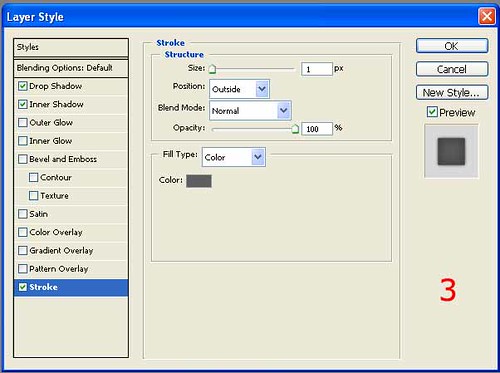
result: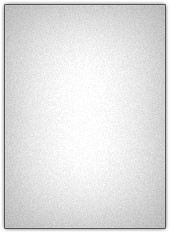
3)Make inset orb
Make a new layer (CTRL +SHIFT+ N) and pick the Elliptical Marquee tool (M).![]()
Create a circle selection like picture:
Pick Gradient tool(G) and follow this steps:![]()

![]()
Now press Ctrl+I in order to Invert the gradient color. Your result should be
like this.
Press Ctrl+l to open "Level window" and set these settings.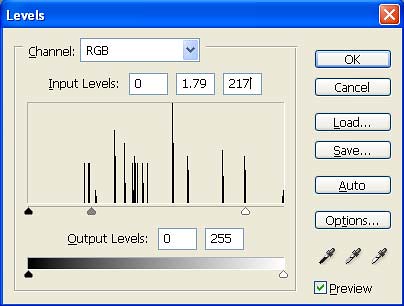
Add inset effect,
we used a black to white gradient for inset effect.
Right-click on selection and make a new layer and drag it's layer under orb
layer.
Pick Gradient tool(G) and follow this steps.

less opacity of new layer, your result should be like this picture.
4)Choose white color and pick the Rectangle Tool (B). Click on your document and
draw a rectangle.
Now we are going to make it's style, follow these steps.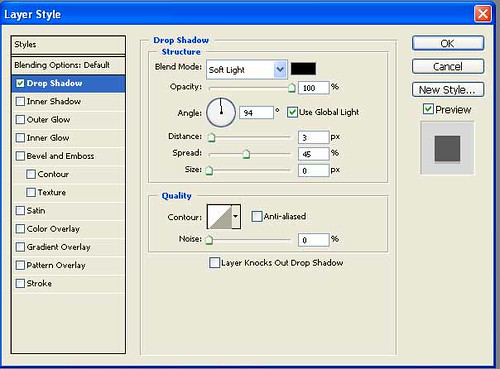
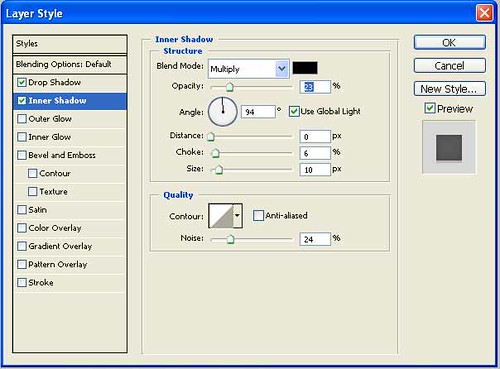

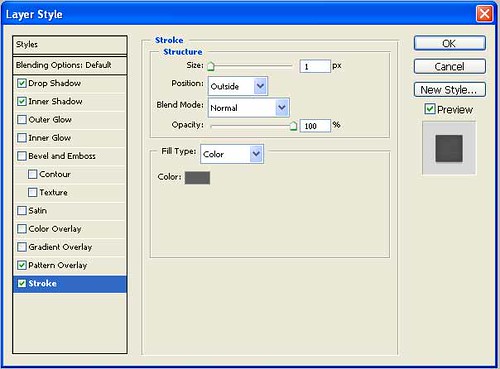
okay, the result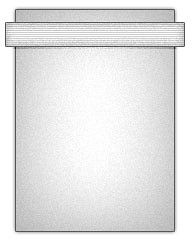
You can add text and some details!we used "Julius" font.
Please send your feedback about this tutorial.
Friday, April 21, 2006
Professional Menu or Content Box
Posted by PhotoshopX at 10:17 PM
Subscribe to:
Post Comments (Atom)
4 comments:
very nice. did it urself? cool, keep up d good work.
Nice tut mate :P
I think I'm going to need that... so thanks :)
www.restavfall.se
Nice tutorial PhotoshopX.
Wow this is totaly amazing!?!?!? i will have to use it for my ePortfolio @ school
Post a Comment